Sunday, November 28, 2010

Creating a Cartoony Print-Ready Business Card in Photoshop

Creating a Cartoony Print-Ready Business Card in Photoshop: "

Business cards are your little marketing companions. They’re small enough to carry anywhere, yet big enough to contain all essential details a prospective client has to know about you.


In this tutorial, we are going to learn how to create a print-ready business card in Photoshop. Designs made for printing have to be prepared in a special manner. Before sending to the printer, it’s best to make sure that your file is ready so you can avoid all the hassle of redesigning, or better yet, the anguish brought by a printing disaster.


Preview


Business cards vary in shape and size. In this tutorial, we are going to design a standard rectangular card with the dimensions of 3.5″ x 2″.


Step 1: Create a New File


Every design made for print is required to have an allowance for bleeds. A bleed area is an additional border around your design. Trimming technology is not an exact science. If you want your design to extend to the edge, the background or images must also extend to the bleeds.


Printing companies have different requirements for bleeds, so you may have to check with your printer first before getting started on your design. The printer I work with requires a bleed of 1/8″ or 0.125″ on each side. Therefore, in setting up our file, we’re going to have to add (0.125 + 0.125 =) 0.25″ to its height and width.


With the added bleeds, our final dimensions become 3.75″ x 2.25″.


Files must have a resolution of 300dpi or higher. Saving your file with a high resolution ensures that blurry or pixelated prints are avoided. Printers also use a different color model for the printing process. When you create a new file in Photoshop, the default color mode is RGB (Red, Green, Blue), which we will have to replace with CMYK (Cyan, Magenta, Yellow, Black). Saving your file in RGB will cause a shift in color when it is converted for printing; use CMYK for higher color accuracy.


Now, open Photoshop and create a new file with the following specifications:


Create a New File


Step 2: Add Guides


Before we start on the actual design, I recommend setting up guides. Guides define the card’s actual dimensions. We have to make sure we don’t forget about the bleeds we’ve added. These guides also represent the trim line.


Press CTRL + R to view the ruler. Go to View > New Guide, then enter the values for your guides.


New Guide Prompt


The term safe zone is another part of printing jargon. Printers require that any important text or images do not go beyond this area. Printed products could still be misaligned when it’s set up for trimming. The safe zone reduces the probability of cropping any significant part of your design.


To define the safe zone, we need to add four more guides, which are 1/4″ or 0.125″ away from the bleed guides. When entering values in the New Guide prompt, just add two one-eights of an inch. That’s 1/8″ + 1/8″ = 1/4″ or 0.25″ on each side.


Canvas with Guides


Step 3: Create the Design


This Step is comprised of creating three parts: the patterned background, our little green friend, and the holders of the contact details.


First, duplicate the background layer. Fill your new layer with a pale shade of green using the Paint Bucket Tool. The color I used is #AFD9B1.


Canvas Filled with Green Background


Create a group called pattern by going to Layer > New > Group. Creating groups helps in organizing your layers. Then, select Custom Shape Tool > Shape > Symbols > Bull’s Eye.


Bull's Eye Shape


Before we create the the pattern, press CTRL + to enable the Grid. Grid lines are useful when aligning and snapping certain elements of a design.


Use #E9EB81 as the shape’s color. First, create a single shape and move it to an intersecting point of two grid lines. Your shape will automatically snap to the intersection. Duplicate the shape and create a whole row.


Create Pattern


Next, right-click the group and select Duplicate Group. Drag down this new group and create more duplicates until you fill the whole canvas.


Duplicate Rows


Now, it’s time to bring our little green friend to life. Use #73BF44 for the foreground color. Select the Pen Tool and create the shape shown below. The alignment doesn’t have to be perfect.


Create Monster Shape


Now, select the Convert Point Tool and use the Bezier handles to adjust the curvature of each point.


Bezier Handles for Curvature Adjustments


To add the eyes and mouth, use the Ellipse Tool. Press CTRL + T if you need to adjust the size and shape. Select the Pen Tool and set the color to #ED1A5D to create the tongue.


Create a glossy effect by tracing the shape shown below and set its opacity to 70%.


Create Gloss Effect


To hold your contact details, we need to add a talk bubble and two boxes. Go to Custom Shape > Shapes > Talk Bubbles and select Talk 1.


Talk Bubble Shape


Drag on your canvas to create the talk bubble. Right-click the layer and select Blending Options. Enable the Drop Shadow and Stroke features, and copy the following values:


Add Drop Shadow and Stroke


Press CTRL + T to tilt its angle to -19.7 degrees and drag it to the upper-right corner of the canvas.


Tilt Talk Bubble


Create two green boxes under the talk bubble using the Rectangular Marquee Tool and fill it with the same shade of green. Add a drop shadow by performing the same procedure we did on the talk bubble.


Card Design Without Contact Details


Notice that the boxes don’t go beyond the safe zone guides. For the talk bubble and our little green friend, the parts outside the safe zone is not so important.


Step4: Insert Contact Details


The final Step of this tutorial is adding the contact details. We are going to use a default MS Windows font for the text.


Use Arial Rounded Font


Use 12pt. Regular Arial Rounded MT Bold for the dialogue inside the talk bubble and 9pt. for the email address and website. Again, remember to place all text inside the safe zone as shown below.


Design Elements Inside Safe Zone


Save your work; check with your printer for valid file formats. TIFF, JPG, and PSD are usually accepted. You may also import your design to PDF.


And voila! We are done!


Conclusion


Here’s the final design after trimming:


Final Design


I hope you enjoyed this tutorial! Please take a minute to chime in and leave a comment below ;)

Friday, November 26, 2010

Feast on Fantastical Food Art Landscapes for Thanksgiving!

Feast on Fantastical Food Art Landscapes for Thanksgiving!: "

foodscapes, food art, eco art, art made with food, carl warner, green design, eco design, sustainable design


This Thanksgiving, if mom is giving you grief for turning mashed potatoes into gravy-covered mountains, maybe you can get her to appreciate your handiwork by showing her these fantastical food photos. It’s all the work of Carl Warner, a UK-based photographer who has spent the last ten years, well, playing with his food. But this is no mealtime distraction: each image involves the work of a team of model-makers and food artists who, in true Thanksgiving spirit, share the leftovers from each photo shoot. Read on to learn more about making breadstick piers and jalapeno shrubery…


Read the rest of Feast on Fantastical Food Art Landscapes for Thanksgiving!http://www.inhabitat.com/wp-admin/ohttp://www.inhabitat.com/wp-admin/options-general.php?page=better_feedptions-general.php?page=better_feed


Permalink |
Add to
del.icio.us |
digg


Post tags: , , , , , , , , ,


"

Monday, November 22, 2010

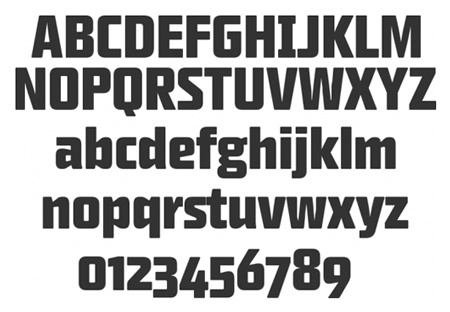
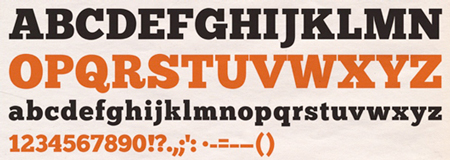
14 cool free fonts

14 cool free fonts: "

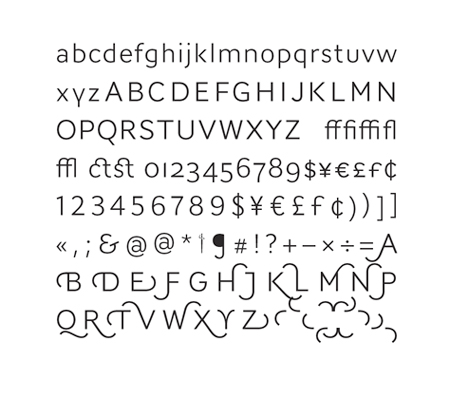
It’s been a while since our last collection of free fonts. Most of the fonts shared in this post shouldn’t be used for blocks of text, but they can be interesting for titles.

1. Lobster

A script font with tons of ligatures and alternate.

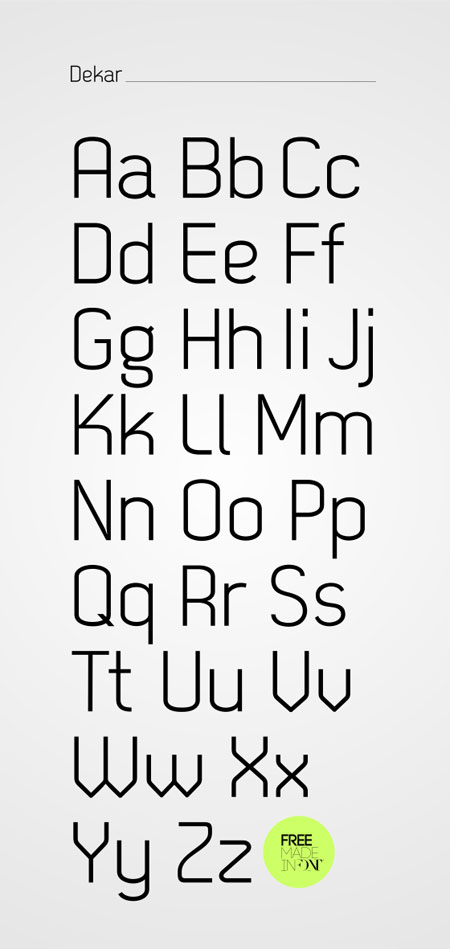
2. Dekar

Clean and lightweight sans-serif font.

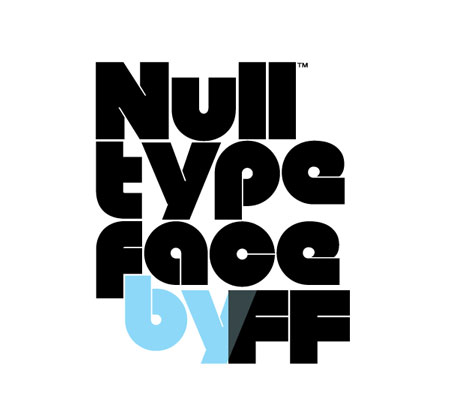
3. Null

Extra-bold rounded sans-serif, not very readable but some letters are really cool (the capital “N” for example)

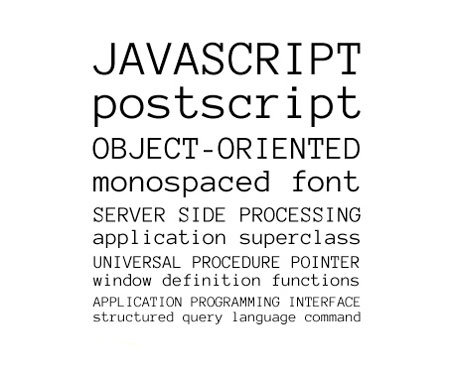
4. Anonymous Pro

Monospaced font designed for coding.

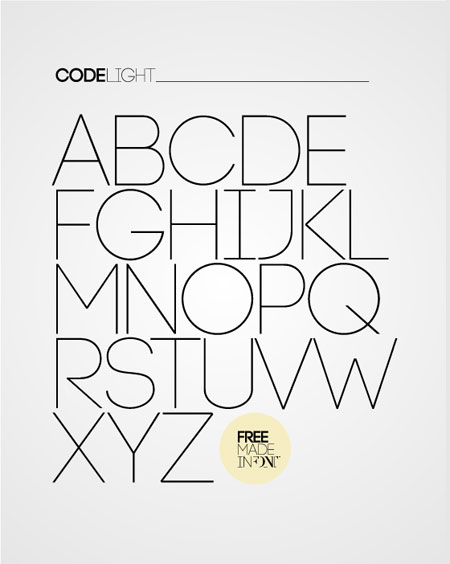
5. Code

Very light and elegant sans-serif font.

6. AW Conqueror

Font pack by Jean-François Porchez for Conqueror.

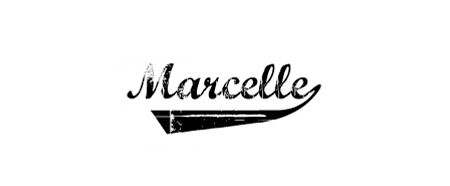
7. Marcelle

A grungy script font.

8. Matryoshka

A font in a font in a font, Matryoshka is inspired by russian wooden dolls.

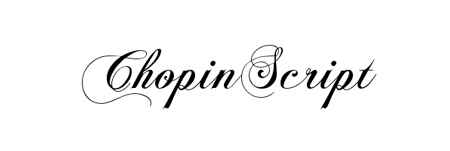
9. Chopin Script

Elegant script font.

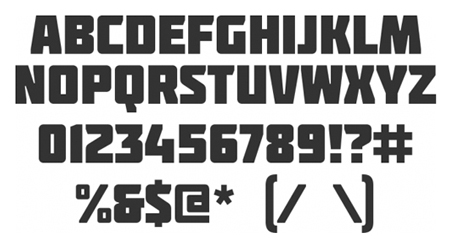
10. Molot

Bold and powerful font with a squared look.

11. CP Mono

Font inspired by the letter style of British car plates.

12. Hitchcock

Font inspired by the work of Saul Bass.

13. Capricorn OSF

Nice bold sans-serif font.

14. Chunk

Ultra-bold slab serif typeface that is reminiscent of old American Western woodcuts, broadsides, and newspaper headlines.


"

Developing Film Part 1 – Loading The Tank

Developing Film Part 1 – Loading The Tank: "

This post is the first in a series where I will talk about developing film at home. In today’s post I will show how I get the film into the light proof developing tank. Future posts will talk about the actual processing.


I developed my first roll of black and white film over 20 years ago and my process hasn’t changed much since then. I should point out that this is how I do it. Different people will have different methods but the one presented here works for me.


The Equipment


Loading Film Into A Developing Tank 1 Developing Film Part 1   Loading The Tank


This is what I use:-


1 dark changing bag


1 developing tank


1 film retriever


1 scissors


A few things to note here: First of all, my method uses a film retriever. A lot of people don’t use this and I will talk about the alternative later. Secondly, all of this is laid out on my kitchen table in daylight. In other words, none of this is being done in a dark room or light proof closet.


Let’s take a closer look at the developing tank, shown here taken apart.


Loading Film Into A Developing Tank 2  Developing Film Part 1   Loading The Tank


At the front is the reel. This reel is a plastic “auto-load” reel. It is called an “auto-load” because film is held on the reel by two small ball bearings and it “walks” automatically onto the reel as the sides are ratcheted back and forth.


At the back is the tank itself and to the right is the top of the tank. To the left is a cylindrical tube which will be inserted into the middle of the reel. When the reel and tube are placed into the tank, the funnel part of the top fits into this tube providing a method of introducing chemicals into the tank while maintaining a light tight environment.


On the left is the tank lid which stops the chemicals from spilling when you invert the tank. I’ll talk about using chemicals for the actual processing in a later blog post.


Some people use stainless steel reels and tanks but I have never used such equipment so I cannot comment on them.


Loading the Film Onto The Reel


As I said earlier, I use a film retriever as part of my method so the first thing I do is use the retriever to pull out the film leader from the 35mm cannister. The reason why I do this is that I like to start my film on the reel in daylight so I can see what is going on.


Alternative Method – As I stated earlier, not everyone uses this method. The more traditional way is to start the film onto the reel in the dark.


Loading Film Into A Developing Tank 3 Developing Film Part 1   Loading The Tank


There are different types of retrievers so I won’t go into details on how to use them here but you should follow the instructions that came with your retriever.


Loading Film Into A Developing Tank 4 Developing Film Part 1   Loading The Tank


To make it easier to load the film onto the reel, cut off the narrow part of the leader.


Loading Film Into A Developing Tank 5 Developing Film Part 1   Loading The Tank


I also cut two slight diagonals into the film at the end to make it even easier to load. Once that is done you are ready to start the film onto the plastic reel.


Loading Film Into A Developing Tank 6 Developing Film Part 1   Loading The Tank


Warning: At this point we are only starting the film onto the reel. Do not allow more than a few inches of film to come out of the cannister or you will fog the first shot or two.


Loading Film Into A Developing Tank 7 Developing Film Part 1   Loading The Tank


Insert the film into the spiral on the reel and make sure it catches in the ball bearings that are on either side of the reel.


Alternative Method - If you are not starting the film in daylight, you will need to do all of the above in the dark changing bag. In that case you will extract the film from the cannister by first opening the cannister. A bottle opener can be used for that. You will then trim the end of the film leader in the dark bag using a scissors and then start the film on the reel as I have shown above.


Once that is done you can put the reel with the film attached into the changing bag.


Loading Film Into A Developing Tank 8 Developing Film Part 1   Loading The Tank


Next you will put the rest of the equipment you need into the changing bag. That means you need to put in the tank and the rest of its parts. So there is less clutter I assemble the tank first.


Loading Film Into A Developing Tank 9 Developing Film Part 1   Loading The Tank


You can also put a scissors into the tank if you plan to cut the film off the 35mm spool later.


Next zip up the bag.


Loading Film Into A Developing Tank 10 Developing Film Part 1   Loading The Tank


Most bags are double lined so there will be at least two zips. The inside of the bag is now lightproof.


Stick your arms into the “sleeves” of the bag and you are now ready to load the film onto the reel.


Loading Film Into A Developing Tank 11 Developing Film Part 1   Loading The Tank


Working In The Dark


Warning: The next few steps take place inside the bag in complete darkness. Obviously, that wouldn’t make for interesting photographs so for the next few photos I am using a black background to signify that this is inside the bag.


First of all, I pull some of the film out of the cannister. I don’t pull it all out since inside the bag it is tidier if remains in the cannister until it goes on the reel.


Loading Film Into A Developing Tank 12 Developing Film Part 1   Loading The Tank


To load the “Auto-load” reel, you ratchet one side back and forth and the film will automatically wind onto the reel. I recommend going slow at first to make sure it is loading properly. Remember all of this is now in the dark so you are going by touch.


Loading Film Into A Developing Tank 13 Developing Film Part 1   Loading The Tank


Pull out more film from the cannister and load onto the reel and continue until all of the film is out of the cannister. At this point you will need to disconnect the film from the 35mm spool. You can either use a scissors (assuming you have one in the bag) or you can just pull the film off the spool with a little force. I usually do the latter.


After the film is detached from the spool, ratchet a little more to get the end of the film onto the reel.


Loading Film Into A Developing Tank 14 Developing Film Part 1   Loading The Tank


Now you need to thread the center tube into the center of the reel. It doesn’t matter which way up the reel is but make sure to push the tube all the way until it stops.


Loading Film Into A Developing Tank 15 Developing Film Part 1   Loading The Tank


Now put the reel and tube into the tank. You must make sure that the reel is at the bottom of the tank so that when you later pour in chemicals, it is completely immersed.


Loading Film Into A Developing Tank 16 Developing Film Part 1   Loading The Tank


Screw on the top of the tank. It should make a click when it is on all the way.


Loading Film Into A Developing Tank 17 Developing Film Part 1   Loading The Tank


You can now remove the tank from the bag and bring it into daylight for processing.


Loading Film Into A Developing Tank 18 Developing Film Part 1   Loading The Tank


If you are not going to process right away I’d recommend putting the lid on the tank since it is possible some light may get in over time.


And that’s how I load a roll of film onto a reel. In this example, I used a 35mm roll but the process is similar with 120 medium format. The only difference is that you can’t pre-load 120 film in daylight so everything is done inside the bag. But with a little practice it will become second nature.


Tips For Beginners.


Sacrifice a roll of film and practice everything in daylight until it is all second nature. You can reuse your sacrificial roll over and over until you get the loading down.


If things appear to be going wrong in the bag it is easy to start getting stressed and frustrated. If this happens, gather up the film in the bag and put it into the tank with the top on. Don’t forget to also insert the center tube to keep everything light tight. Then take a break for a few minutes. When you come back to it, everything may just fit into place.


You may find it easier to load a 120 roll in a lightproof closet compared to a changing bag. My changing bag works for 120 but it is a little small.


Make sure you know how your equipment works. You may have a different tank than me so read the instructions before starting. Once again if you practice with it, everything will be easy once you start to load film blind.


I may have left something out so please let me know in the comments if something is not clear.


Next time I will talk about the chemicals we will use to develop black and white film.


"